
TIMBER Brand by Nanogram presents : the making of the “Thankful Chalkboard”, our latest hack for an erasable chalkboard great for selfies or still life photographs. Are you “thankful” for something? Make this board and tell the world.
If you don’t yet know us, we are Nanogram, a group who by day serve as designers and architects and by night delight as hackers, makers and reverse-engineers. Our toys for modern humans are available at thenanogramstore or nanogram.bigcartel.com.
Today, we illustrate how to create your very own erasable chalkboard using materials found at your local building supply store. In this tutorial, we walk you through AutoCAD, Adobe Illustrator, the laser cutter, and ultimate use of the “Thankful Chalkboard”.
STEP 1. Drawing your Board in AutoCAD
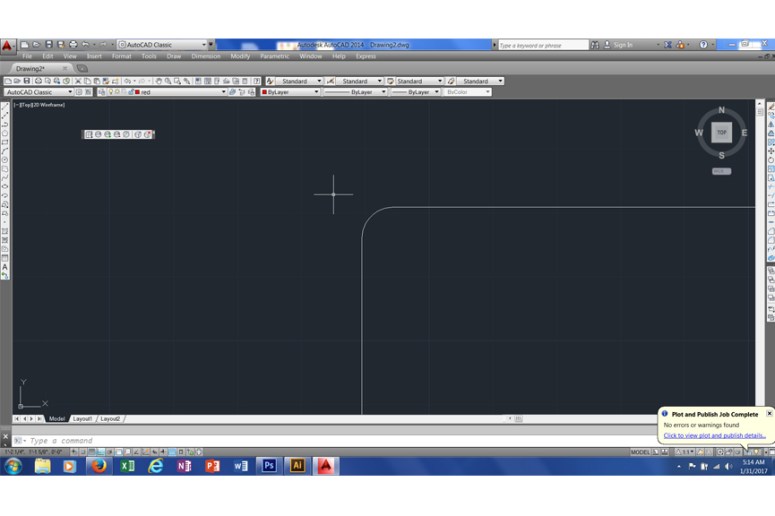
With your design in mind or sketched on paper, decide the size of your board that will eventually be lasercut. We begin by drawing a board in AutoCAD that is 8” H x 10” W and radius the corners ¼”.
Step 2. Print to Adobe Illustrator.
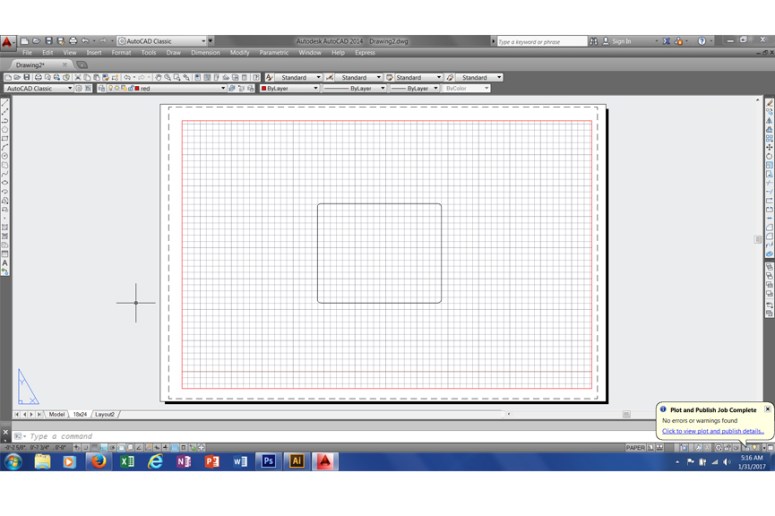
Often in our tutorials, you will notice that we separate cut (RED) and score (GREEN) lines into colors. Given the simplicity of the shape we are exporting, we will skip this step and perform these tasks in Adobe Illustrator in a subsequent step. From Paper Space, ensure your drawing is to scale by double clicking in the drawing area and using command Z [enter], s [enter] 1xp [enter]. Click outside the drawing area. This will ensure you are at a scale of 1:1. Now print to .PDF. Note this drawing is set to 15”x24”.
For more information on how to print from AutoCAD to Adobe Illustrator, please view our Mr. T. Magnet Tutorial.
Step 3. Open PDF and Set Up Text.
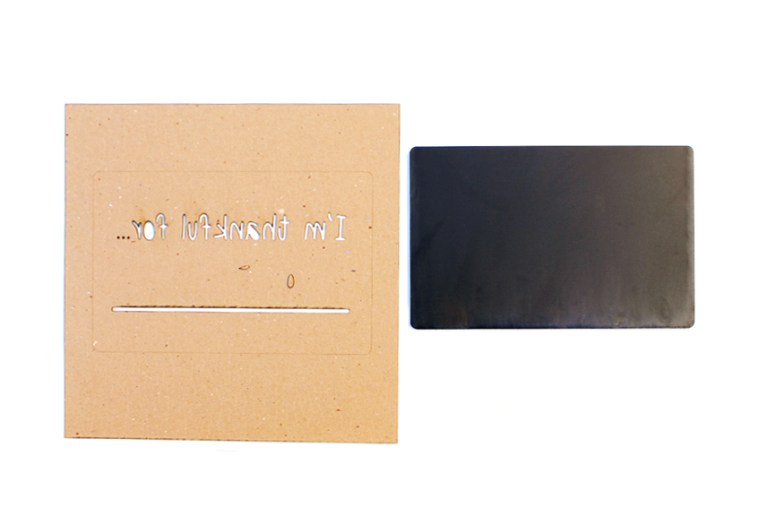
As you observe, we begin by adding the desired text. “I’m thankful for …”.

As you observe, we begin by adding the desired text. “I’m thankful for …”.
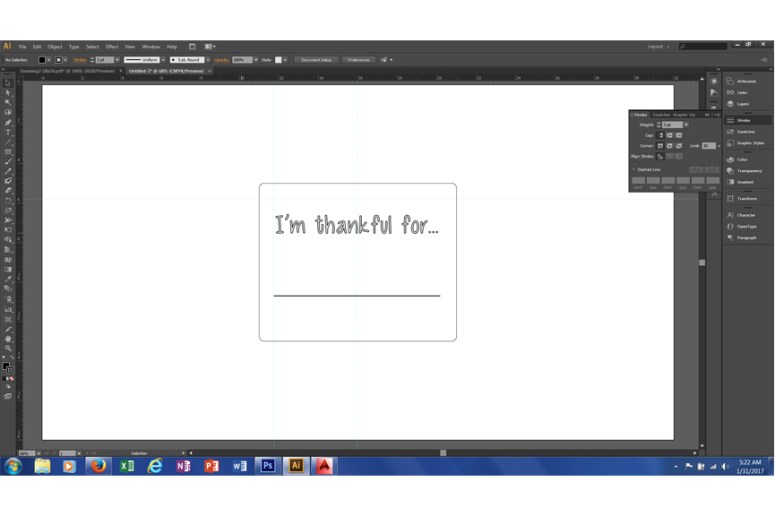
For this example, we found a free font from www.dafont.com to make the chalkboard look more hand-made. Next, strike a line below the text which will serve to handwrite what you are thankful for. Select the text and invert to outlines (stroke rather than fill) as we are creating a stencil to be cut with the laser cutter.
Using your line as a guide, create a box with a height of 0.25” and a length of 8” and center this on the line. Erase the guide line.

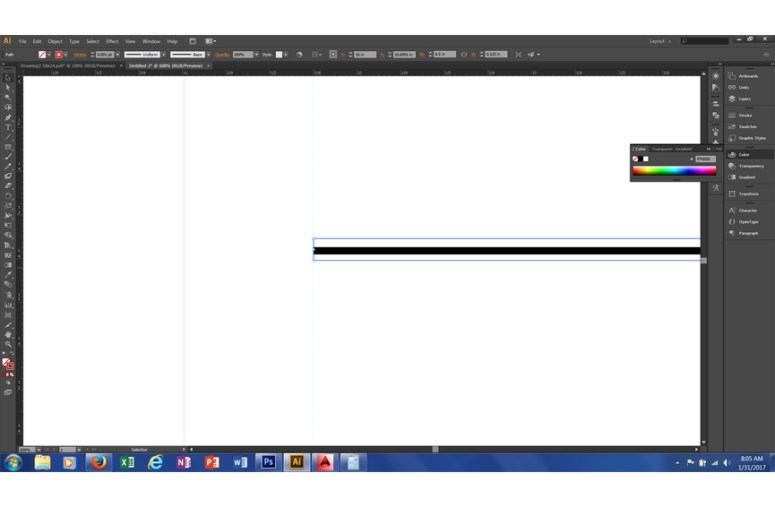
Mirror the text for the stencil template. Now we can start separating the line types between what is to be cut and scored. Observe: We are making two different files; one in red and one in black. The RED will be the template (File A) used to spray paint the text and line onto the cut chalkboard shown in black (File B). Print to the laser.
Step 4. Materials.

Materials for this project are actually pretty simple. ¼” Chalkboard MDF is easily found in Home Depot, but, if you can’t get your digits on this simply buy ¼” plywood and chalkboard paint from Amazon and it works the same. We used chipboard for the stencil, but you can use a thin plastic or posterboard. White Rustoleum Primer is also available from local hardware stores but and standard white primer will suffice. Lastly, and this one is clutch, Erasable Chalkboard Markers are simply awesome. It’s the first time we have tried it, it’s a great product we got through Amazon. Give it a try. It really is washable.
Step 5. Laser Cutting the Template.

Using the Universal Laser Systems, the settings we chose were Power 100, Speed 8, DPI 500 to cut through the chipboard stencil. For the ¼” chalkboard MDF, we used Power 100, Speed 6, DPI 500, but ran it twice. You will notice from the image below that the second run will leave burn residue on the wood. This is removable using SimpleGreen solution and wiping the board clean.
We etched into the stencil, an outline of the chalkboard to provide a guideline.

Tape, and spray

Step 6. The Big Reveal.

For our prototype of the “Thankful Chalkboard”, we ended up with a board 6” tall by 10” long. As you can see, the options for this are endless. Recipe Boards, To Do Lists, Calendars, Games, etc. can all be made by hand and by you. Why are you still reading this? Get to making!
This DIY project is our gift from Nanogram to the globe for all of your years of support. Don’t forget to follow us on Instagram @nanogramstudio for updated experiments and our ever expanding catalog of goods @nanogram.strongbox.
Thanks everybody, enjoy this and our other products on our etsy store and bigcartel shop.
