
February, love is in the air right? Valentine’s Day cards abound this month so why not make one with wood and laserbeams? But this is Nanogram, we are unconventional. What about when you need to send a card to a pal just because and it can’t be lovey dovey? Enter the Man Cards.
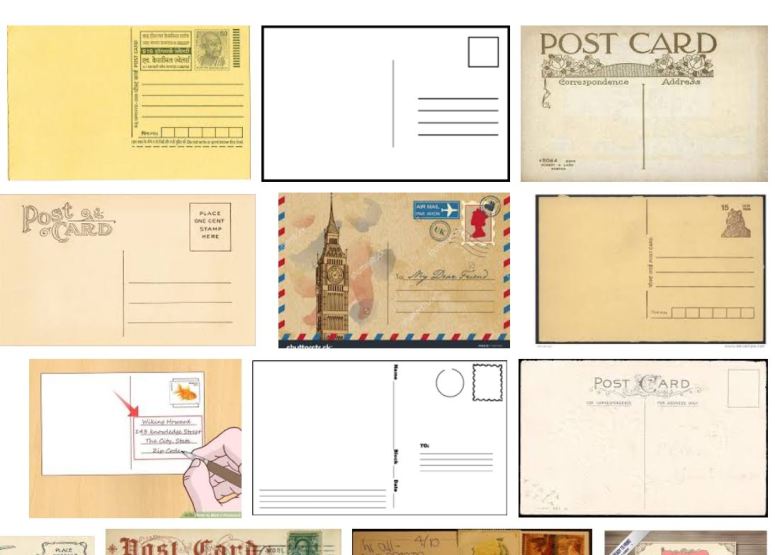
Step 1. “Acquire” a Postcard Image.
Being a bit rusty on what postcards are supposed to look like on the back, frankly it’s much easier to “acquire” an existing template from the interweb. Save that image and trace it in AutoCAD!
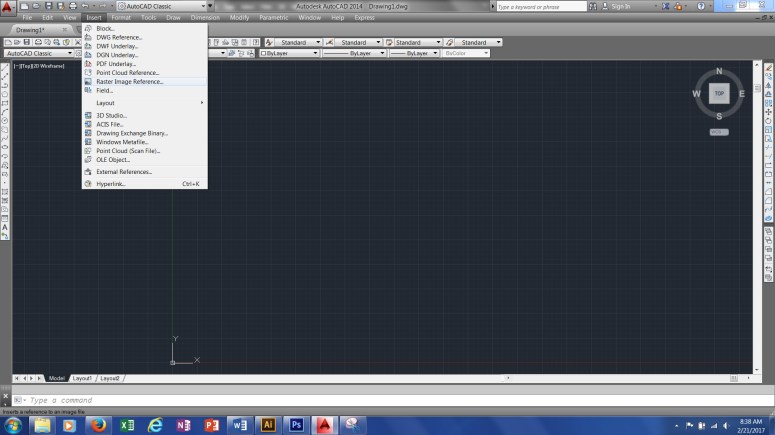
Step 2. Digitizing a Card in AutoCAD.
Insert the saved postcard image. With AutoCAD open, select Insert > Raster Image Reference.
Hit enter for all defaults and insert the image.

In the Layer Manager, add two new layers and rename to CUT and SCORE. Usually we use red for CUT and green for score, setting the line weight to 0.00mm.

Scale the image by first deciding the size of the Man Card you want to make. Since we are using 1/8” Alder Wood planks that can be bought at 4” x 12” lengths from www.ocoochhardwoods.com, lets scale the card to 4” x 6” so that we can get 3 cards out of each board. No waste.

Start tracing, ensuring to remember that in our case, red is CUT, green is SCORE (ETCH)
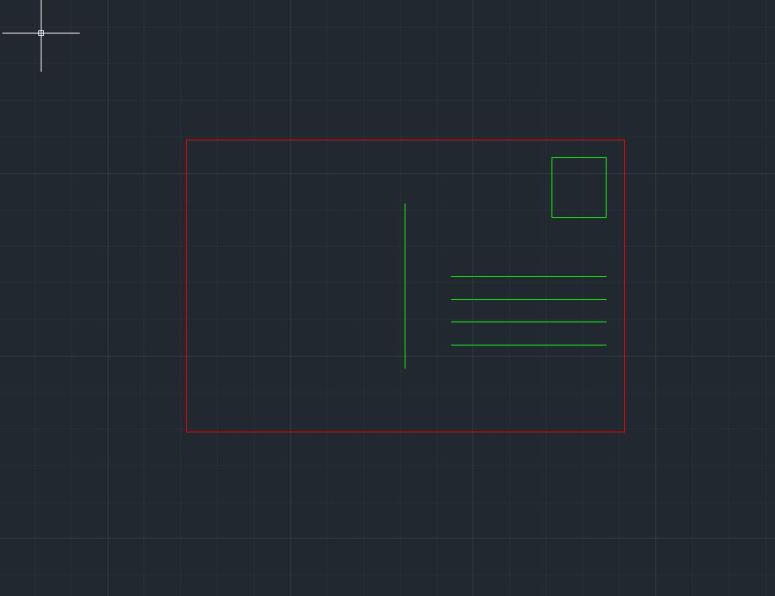
For this example, we will FILLET the edges to a ¼” radius. Typically our cards host 90 degree corners, but hey, we are experimenting!

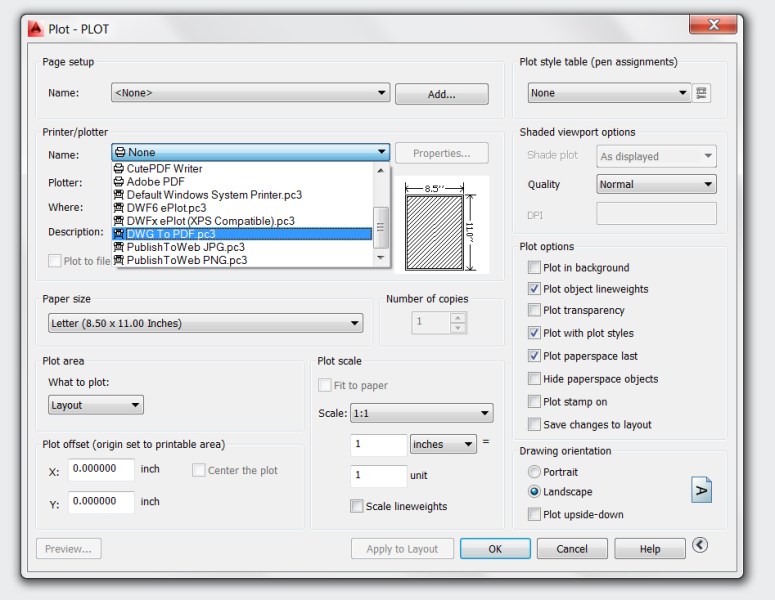
STEP 3: CAD to Adobe Illustrator.
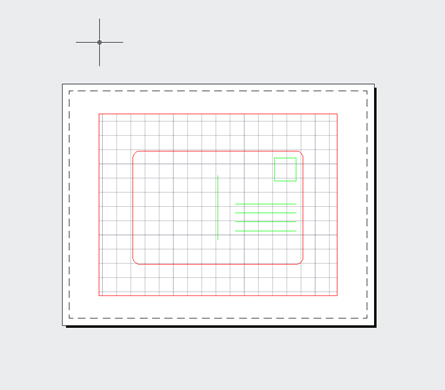
Click the LAYOUT view tab along the bottom ribbon. Right click and rename to PLOT. To scale 1:1, double click inside the drawing window and use command: ZOOM (Enter) > SCALE (Enter) > 1XP.
To print the file to PDF, click FILE > PLOT. For the printer, choose DWG to PDF. Save the PDF file for import into Adobe Illustrator.
STEP 4. Making a Cut File for the Laser.
With Adobe Illustrator, open, click FILE > OPEN. Choose your PDF. Create two new layers and rename them FRONT and BACK respectively. Copy all of the card line work and paste into both layers. When you copy (CTRL+C), make sure to paste using Edit > Paste in Place. For the front of the card, erase all of the green lines.
The front of the card is ready for your artwork. I used text found for free from www.dafont.com, and an icon image “acquired” from the interweb. This looks like a card we could give among men. Let’s laser! Save a copy of the “FRONT” file as a PDF making sure that is the only layer on. Turn off ‘FRONT’ and turn on ‘BACK’. Save a PDF.
STEP 5. Laser Beaming a Man Card.
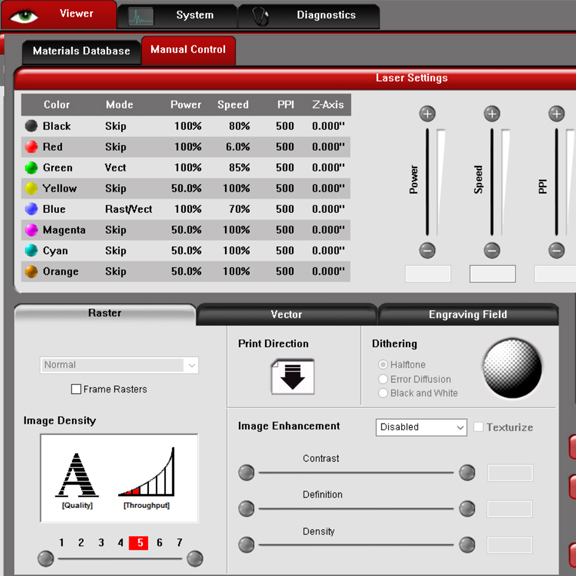
When testing out the layout of the wood card, we created a template engraving on a sheet on scrap cardstock. Then, we lay down the 1/8” Alder wood plank we bought from Ocooch Hardwoods (http://ocoochhardwoods.com/scroll_saw_lumber.php). Change the laser settings for Black (ENGRAVE) to Power: 100% Speed: 80% PPI: 500; Red (CUT) to Power: 100% Speed 8% PPI 500; and Green (ETCH) to Power: 100% Speed: 85% PPI 500.
The engraving will look burned, but this we sand away prior to applying the beeswax to seal.
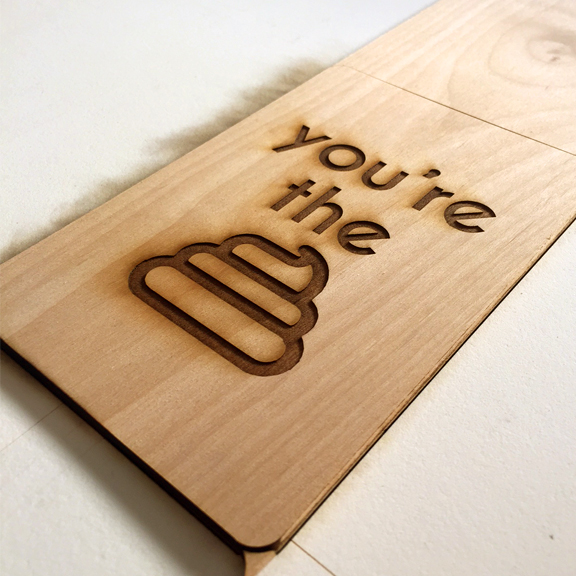

At last, you have made your very own wood card! Now you can form your own sweat shop making Bro Cards to your heart’s content. A wood card has myriad benefits aside from durability. It is completely personalized by you and can reflect your ingenuity and sharp wit. The user is sure to hang on to something this substantial and hand made. Thanks for following along! Be sure to follow us on Facebook (https://www.facebook.com/nanogramstore) and Instagram @nanogramstudio as we continue to explore the methods of making with laser beams.
About Us:
If you don’t yet know us, we are Nanogram, a group who by day serve as designers and architects and by night delight as hackers, makers and reverse-engineers. Our toys for modern humans are available at thenanogramstore or nanogram.bigcartel.com.

One thought on “Making a Wooden Greeting Card”