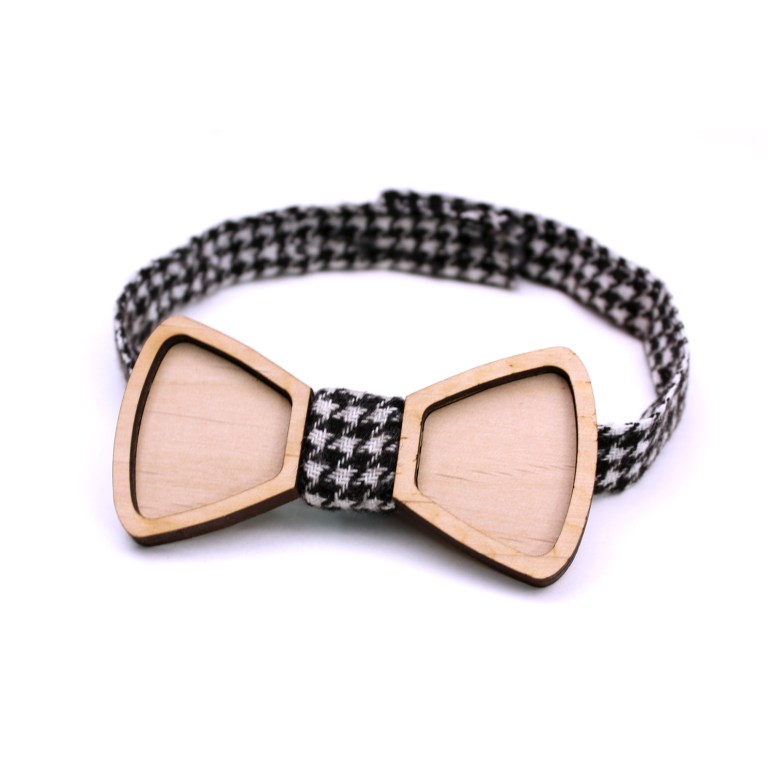
Welcome back people. March we tackled something special. You know you’ve seen them; the wooden bow ties. But, what about for little tikes? We tried (pseudo successfully) to recreate a wooden bow tie from scratch for the smallest member of Nanogram. L. Michael L.’s little boy Gunnar.
Step 1. “Acquire” a Bow Tie Image.
We know what a bow tie looks like right? Well at least in concept, but for our purposes, we scoured the interweb for what would make for a cool looking wooden bow tie. There are loads out there.
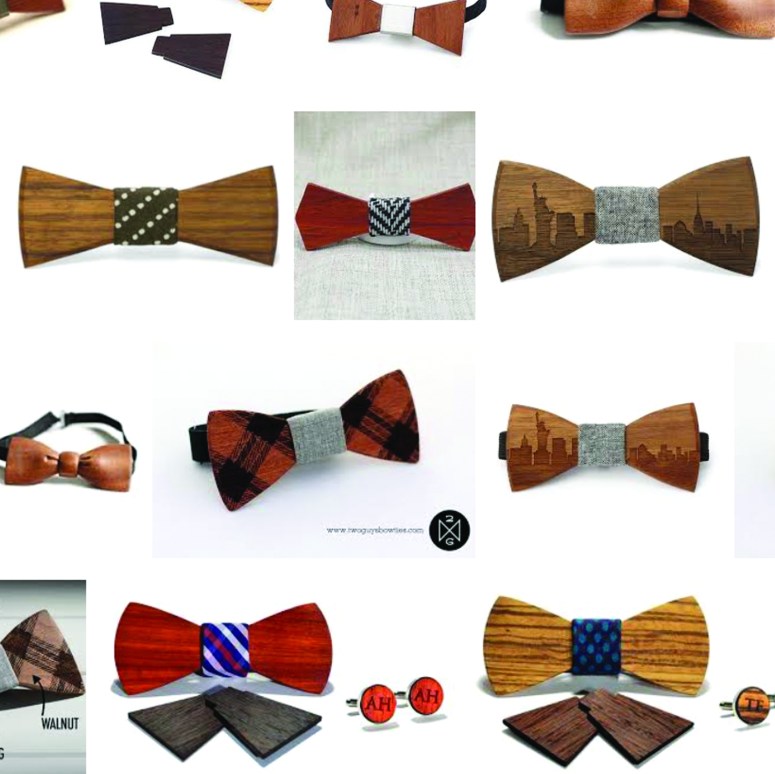
We downloaded a bow tie image to use a base to trace. Save that image and trace it in AutoCAD!

Step 2. Digitizing the Bow Tie in AutoCAD.
Insert the saved bowtie image as a Raster Image Reference. If you forgot how, refer to our previous post which walks you through the process. https://timberbrand.com/2017/02/22/making-a-wooden-greeting-card/.
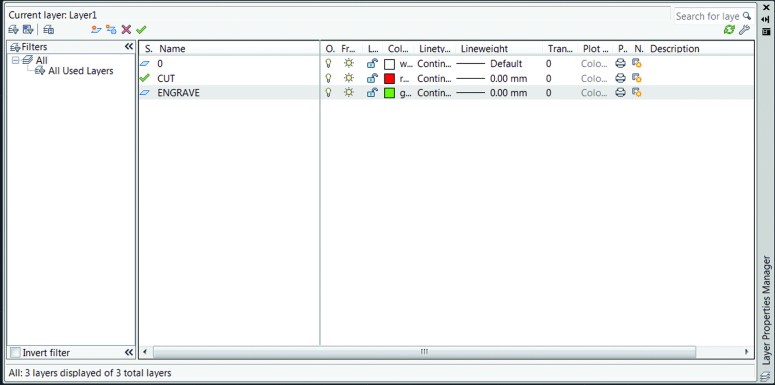
In the Layer Manager, add two new layers and rename to CUT and SCORE. Usually we use red for CUT and green for score, setting the line weight to 0.00mm.
Scale the image by first deciding the size of the Bow Tie you want to make. As with our previous post, we are again using 1/8” Alder Wood planks that can be bought at 4” x 12” lengths from www.Oochwood.com. NOTE this deviation: If you want an adult size tie, use the measurements shown below 2.5” x 4.5”, but we later found that for a mini man, we eventually used a 1.5” x 3.5” tie.
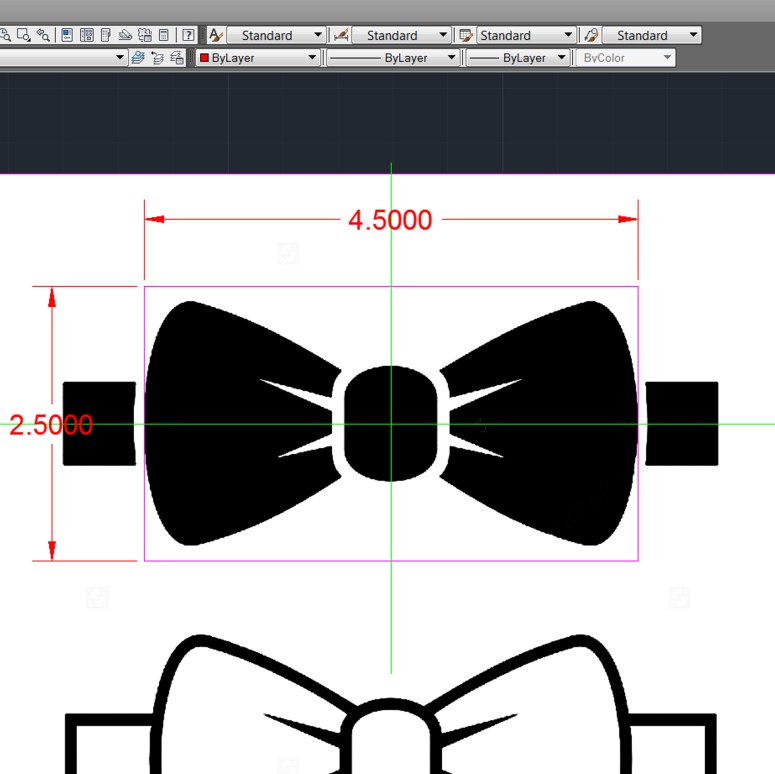
Start tracing, ensuring to remember that in our case, red is CUT, green is SCORE (ETCH)

On the right is what we ended up with for a base for the bow tie. Not bad!

Again as a refresher, we use GREEN as score lines on the laser, they will eventually serve us as guides when we are gluing our pieces together. We offset a polyline of 3/16” that will eventually be cut out and glued as an extrusion for our tie.
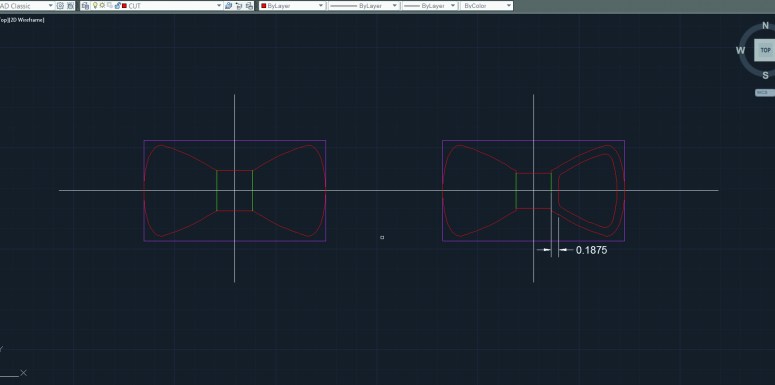
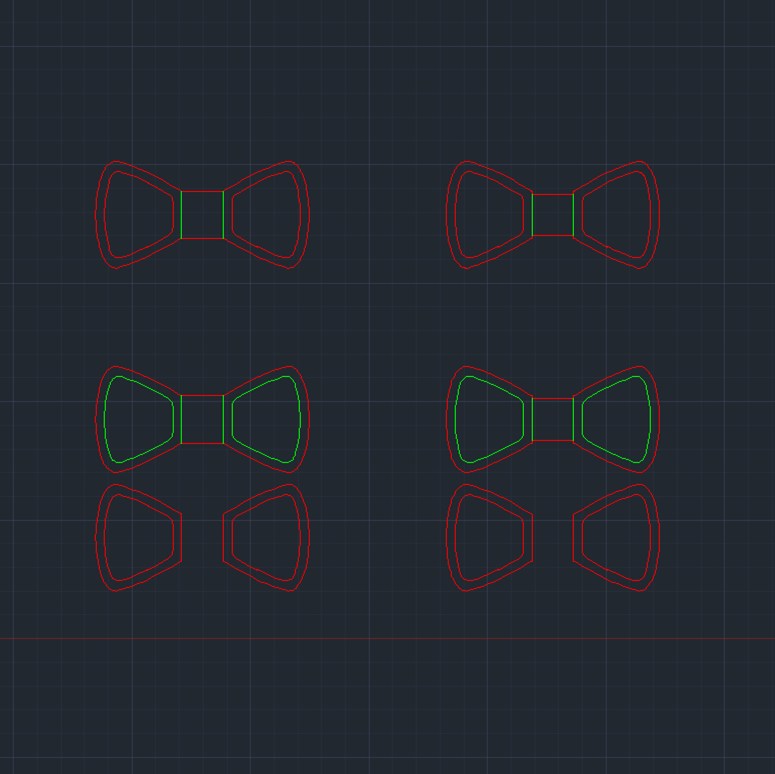
As we view the final cut files in CAD before sending to Illustrator, we notice on the bottom section there will be two files per tie. The first is the base of the tie. The red outline is cut, while the green lines are etched as a guide for us to glue the next file below. Second is the extrusion file, which when cut, is then glued onto the base to create the layered bow tie.
STEP 3: CAD to Adobe Illustrator.
For a brush-up on how to export files to Adobe Illustrator, refer back to our previous tutorial: https://timberbrand.com/2017/02/22/making-a-wooden-greeting-card/
STEP 4. Making a Cut File for the Laser.
With Adobe Illustrator, open, click FILE > OPEN. Choose your PDF. At least for our laser, we have to ensure we are using RGB colors and, again, RED (255,0,0) is cut and GREEN 0,255,0) is score/etch.

STEP 5. Laser Beaming a Bow Tie for Wee Men.
When testing out the layout of the bow tie, we first used scrap 1/8” hardboard laying around the shop. No use wasting more expensive Alder. Good thing too as this is about when we realized our dimensions were set for an adult sized tie and subsequently had to re-size.

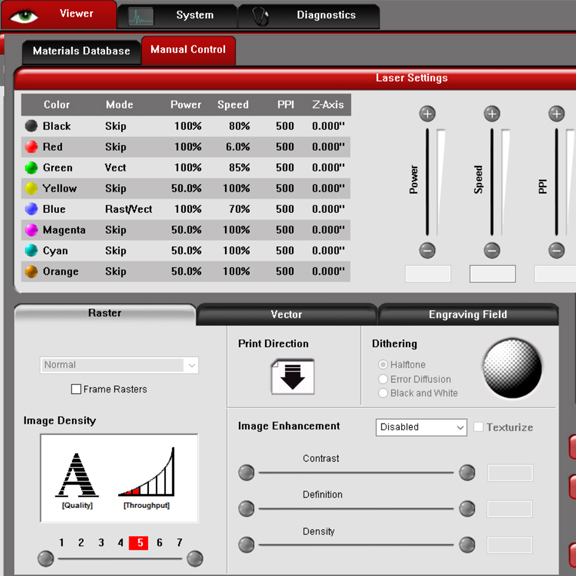
Change the laser settings for Red (CUT) to Power: 100% Speed 8% PPI 500; and Green (ETCH) to Power: 100% Speed: 85% PPI 500.
The engraving will look burned, but this we sand away prior to applying the beeswax to seal.

STEP 5. HELP! We can’t sew worth a damn!

We sat on the above image for a week before building up the huevos to ask our admin Karla K. (@POLYMATHMOM on Instagram if you don’t yet know her) if she could stitch things. What a fail. Of course, after much negotiation and much begging, she completed the following.

For the center strap, cut a piece of your preferred fabric to ¾” x 2.5” and sew one of its long sides (if you want to know how this wizardry is done, you need Youtube). Turn inside out to hide the stitching. Yes, we know it got crazy complex. The neck strap is done in the same manner ¾” x 15”. Once ironed flat, you can either glue or sew Velcro as the fasteners.

At last, you have made your very wooden bow tie for little people! This one tested our limits and we grew grey hairs in the adventure but we learned that people who sew will have work post apocalypse and architects who don’t are simply meaningless dopes. Thanks for following along! Be sure to follow us on Facebook (https://www.facebook.com/nanogramstore) and Instagram @nanogramstudio as we continue to explore the methods of making with laser beams.